


Introduction
abjd.store is a multivendor Marketplace platform that provides market access and penetration to all types of vendors and sellers to reach a wider segment of customers with a high reach volume and traffic.
The major endeavor of vendors and sellers when opening their own online stores is how to bring traffic to their website, most online stores open and do not succeed without being ever noticed by customers. Moreover, setting up online payment methods becomes a major endeavor for small vendors and sellers, not mentioning the cost of maintaining an online store and all the headache of its logistics.
As for customers, fragmentation is frustrating, people don’t want to navigate multiple websites and online stores to buy an item, they want to see all options in one place, compare offers, sellers, variations etc. all in one place.
abjd.store Marketplace provides solutions to all the above problems, customers get a consolidated view of all products from multiple vendors and sellers in one place, can make comparisons and chose the best fit product with one click. sellers can reach more customers, have high traffic on their products and offerings and get access to online payment methods and never worry about the logistics of having their own website and store. Your store is hosted on abjd.store for FREE, you pay when you sell.


Vendors or Sellers’ subscription plans are formulated in a way to provide ease and relief to the Seller, there are no fixed costs, all plans are FREE to host, and some plans are FREE to sell also.
Chose the plan that suits your business more from the following subscription plans.
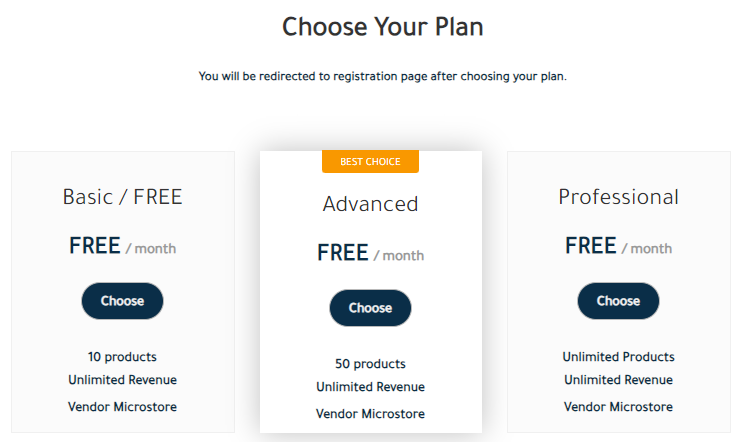
For a limited time, all subscription plans are without subscription fees.
Costs
Once a sell is made on the Marketplace, certain costs become incurred by the Seller, these costs are:
Subscription Fees
Depends on the selected subscription plan: Zero for the Basic plan, 0.5 JD for the Advanced and 1.0 JD for the Professional. This is a fixed fee on the order to cover the cost of hosting the Vendor’s / Seller’s store on the Marketplace.
Payment Surcharge
This is a percentage fee on the order total to cover the cost of the online payment gateway as follows:
All Payment Methods 2.0% + 0.10 JOD from the sales totalSales Commission Fees
This is a percentage fee on the products categories; not on the order total; this fee covers the costs of marketing and all other activities performed by the Marketplace to secure your sale.
The percentages vary per category of product as follows:
Example
Seller sells an order containing the following items:
Required Information
Required information to register a Vendor / Seller account and open a store:
- Store Name.
- Sales Tax Number (If Applicable).
- Banking Information (IBAN).
- Scanned copy of Store Owner/Administrator ID.
- Scanned copy of Company Registration Document (If Applicable).
- Scanned copy of Vocational License Document (If Applicable).
- Scanned copy of Sales Tax Registration Document (If Applicable).
To avoid bank commissions on transfers, it is preferable to provide us with a bank account number at Bank al Etihad.
Profile Registration
1. Go to abjd.store and scroll to the bottom section and click on Register.

A pop-up will appear to remind you to read the Seller’s Guide and Terms & Conditions before entering the seller area.

2. Select the plan that suits your business by clicking on the Choose button.
3. You will be redirected to the application form, fill all the information needed, read and accept the terms and conditions, check the validation box and submit.
Note: please make sure all the entered information are correct and updated.

4. You will receive a confirming email from Storejo@abjd.store to activate your account.
*If you don't receive it in your inbox, please check your junk email.

5. You will receive an email from store@abjd.store containing the Login email and the Password for your Seller profile and the login link (please keep this information private and don’t share it with anyone)
*If you don't receive it in your inbox, please check your junk email.

6. Go to abjd.store and scroll to the bottom section and click on Login and enter your credentials and start setting up your account.
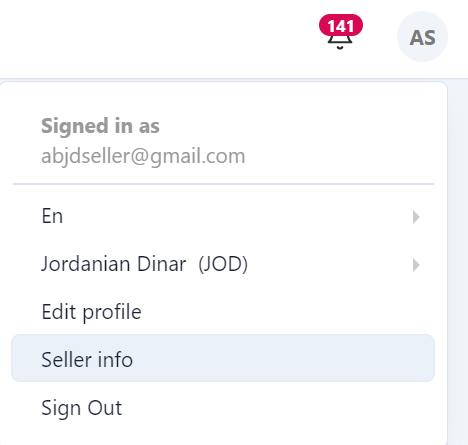
7. To switch the Vendor Panel to Arabic language, click on the icon in the top right corner, hover over the current language “EN” and click on “AR”.
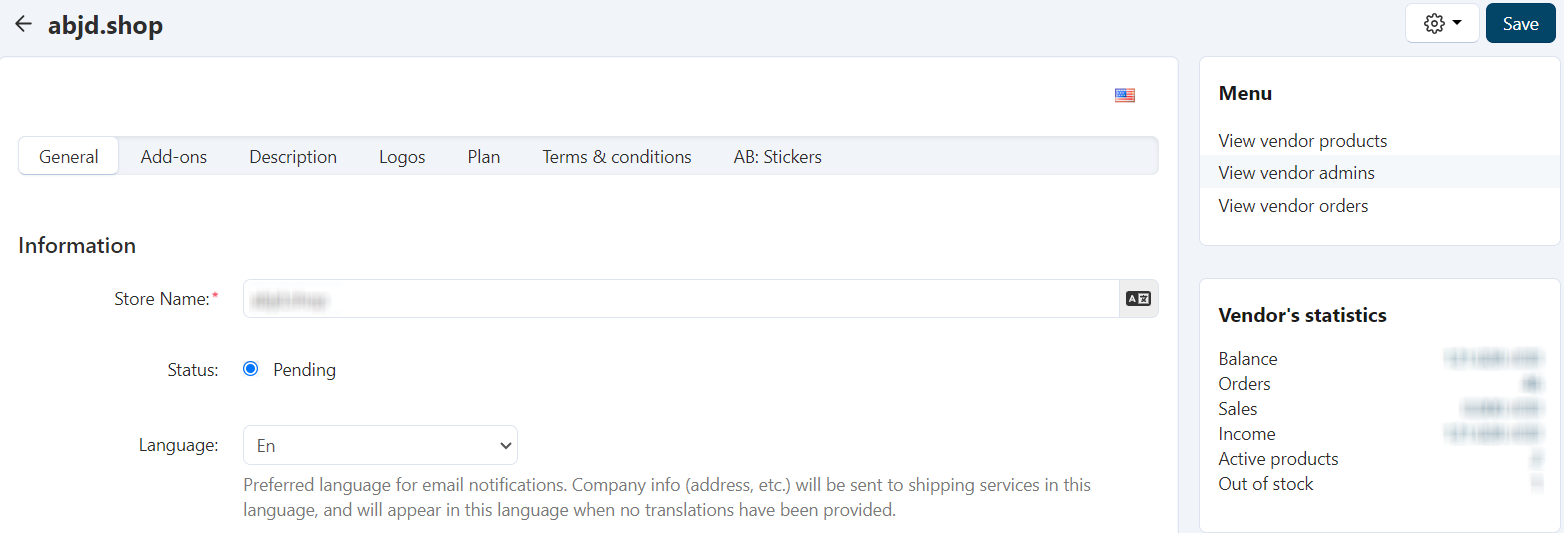
8. Click on the icon in the top right corner and select "Seller info".
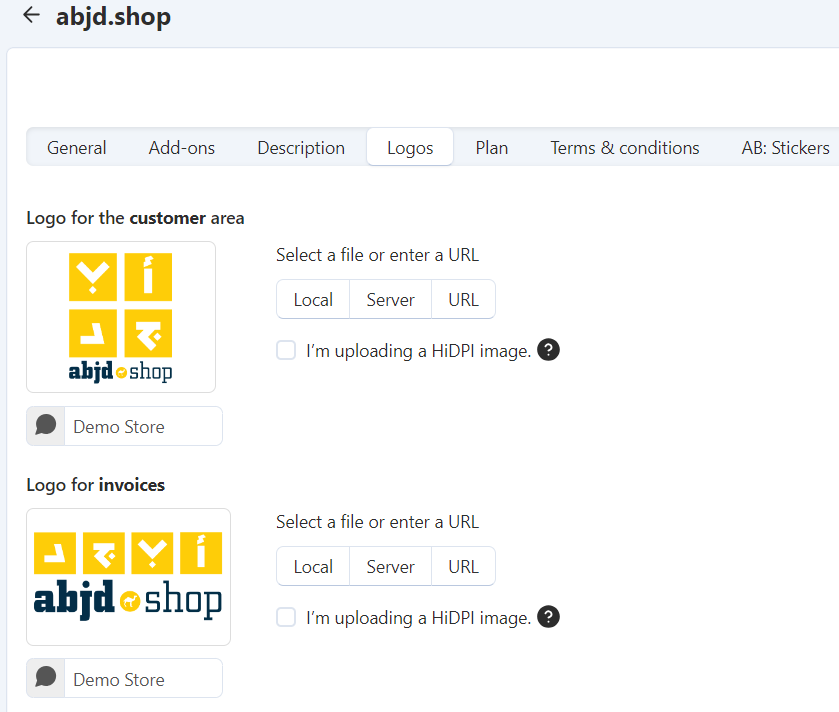
In the Logos tab, add your logo image (Check Appendix A) that will be displayed on the storefront and the emails and invoices that will be sent to the buyer.
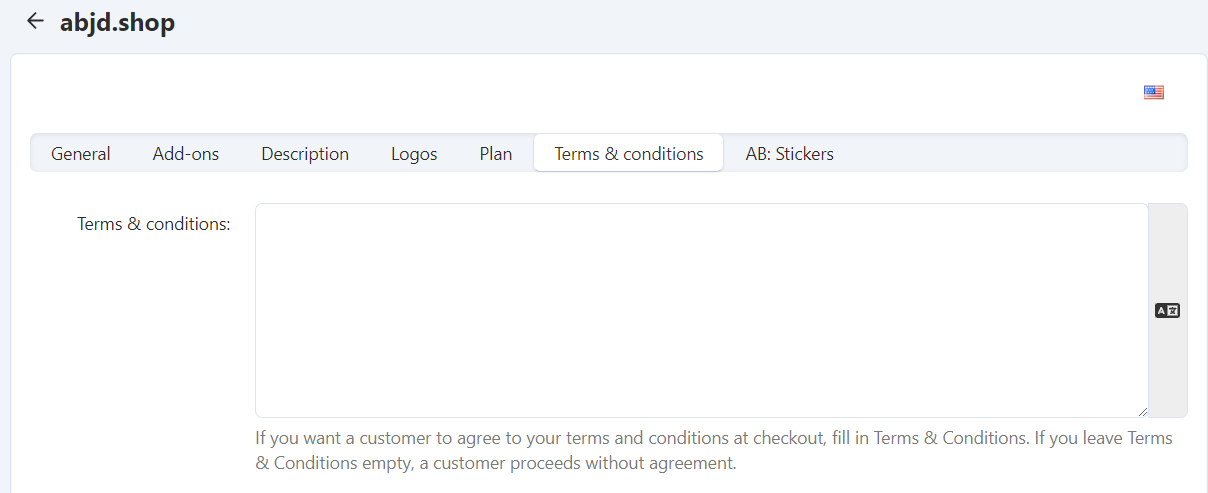
In the Terms & Conditions tab, add your Terms & Conditions for the buyer to agree on.
Your profile is now set and ready.
To add an Admin for your store Please follow these steps:
1. Click on the icon in the top right corner and select seller info.
2. On the right side menu click on view vendor admins.
3. Click on the (+ Add user) icon in the top right corner.
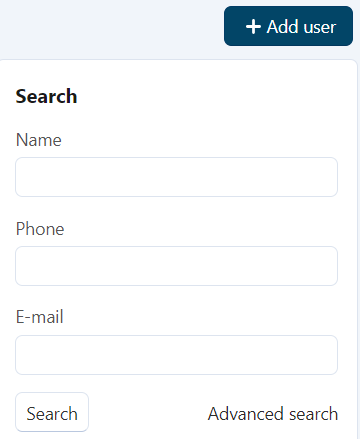
4. Add the new vendor admin information.
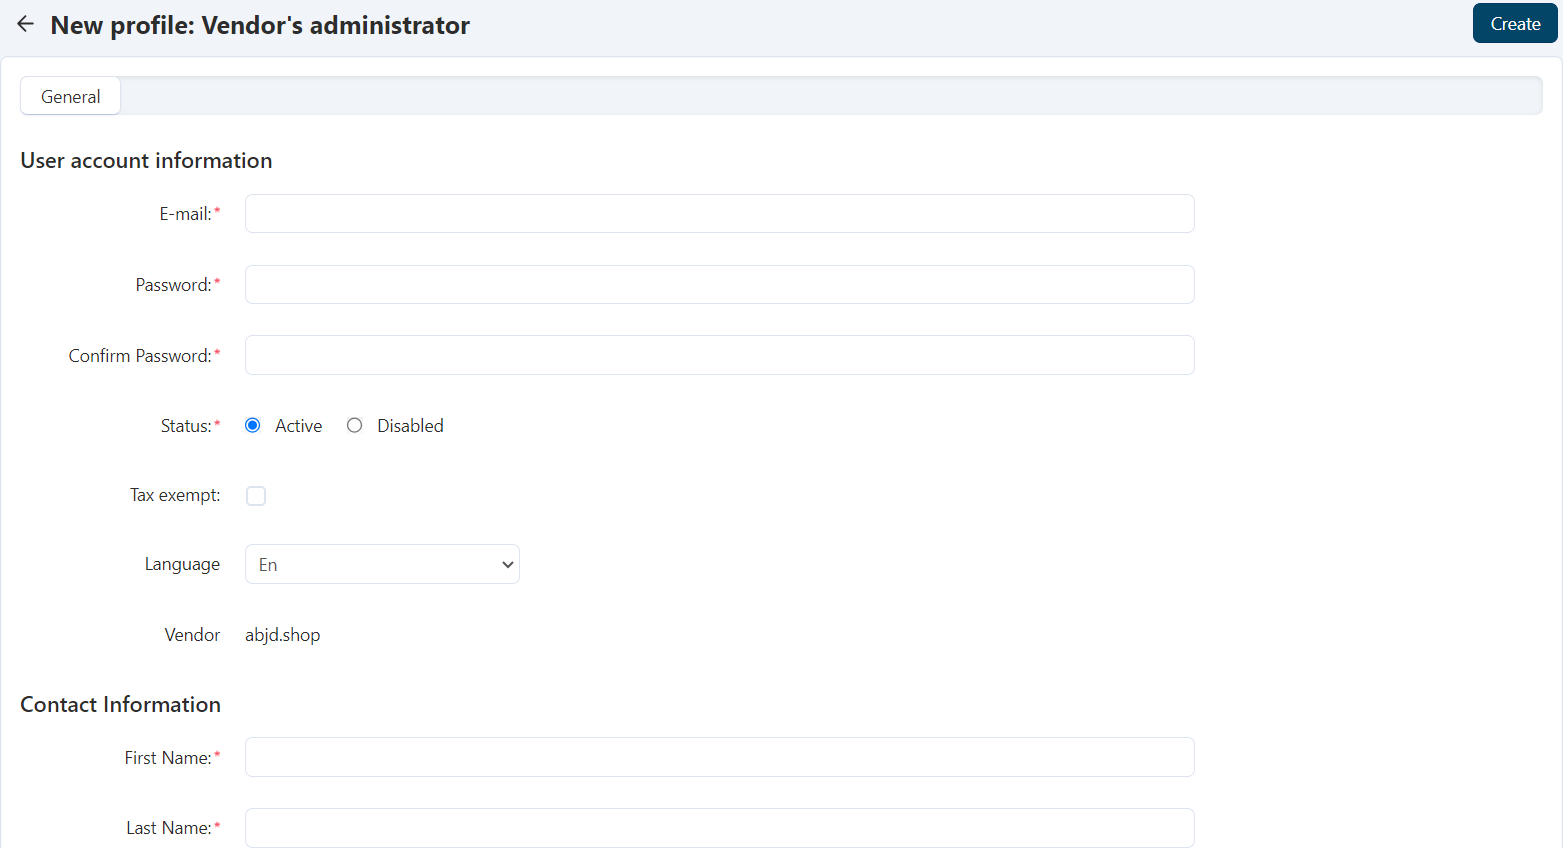
5. Click on create on the top right corner.
Your Vendor admin is now ready
NextSetting Shipping Methods
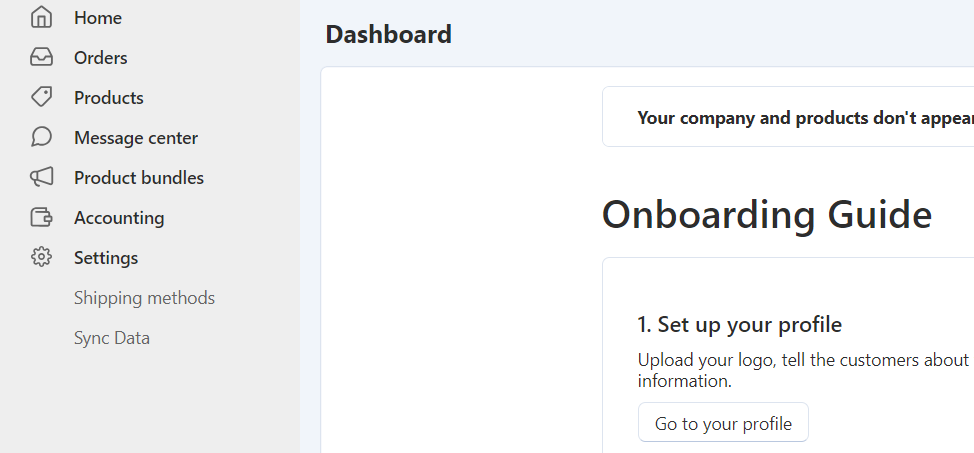
1. To create a new Shipping Method, go to the side panel on the left of the page, click on Settings, and then choose Shipping Methods.
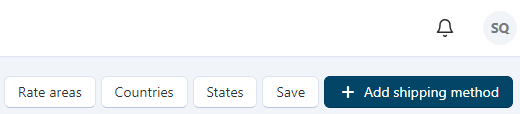
2. Click on the "Add shipping method" button at the top right of the page.
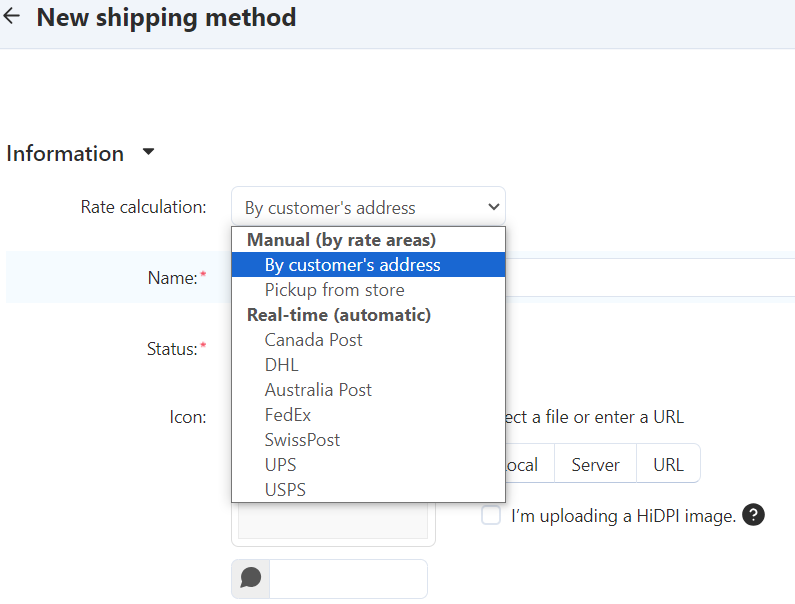
3. At the rate calculations field, choose By Customer’s address.
4. Add a name to your delivery method. Upload an image (Check Appendix A). Specify a delivery time (e.g., 3-5 days). Add description and click Create at the top right.

Keep the shipping method availability to all. If you specify a weight limit, the shipping method won’t be available for products that exceed that weight limit (keep it at 0.00 to be available for all products).
5. After creating the shipping method, several tabs will appear, click on the Shipping time and rates tab, choose all the areas you deliver to, specify the time and cost for each area and click Save.
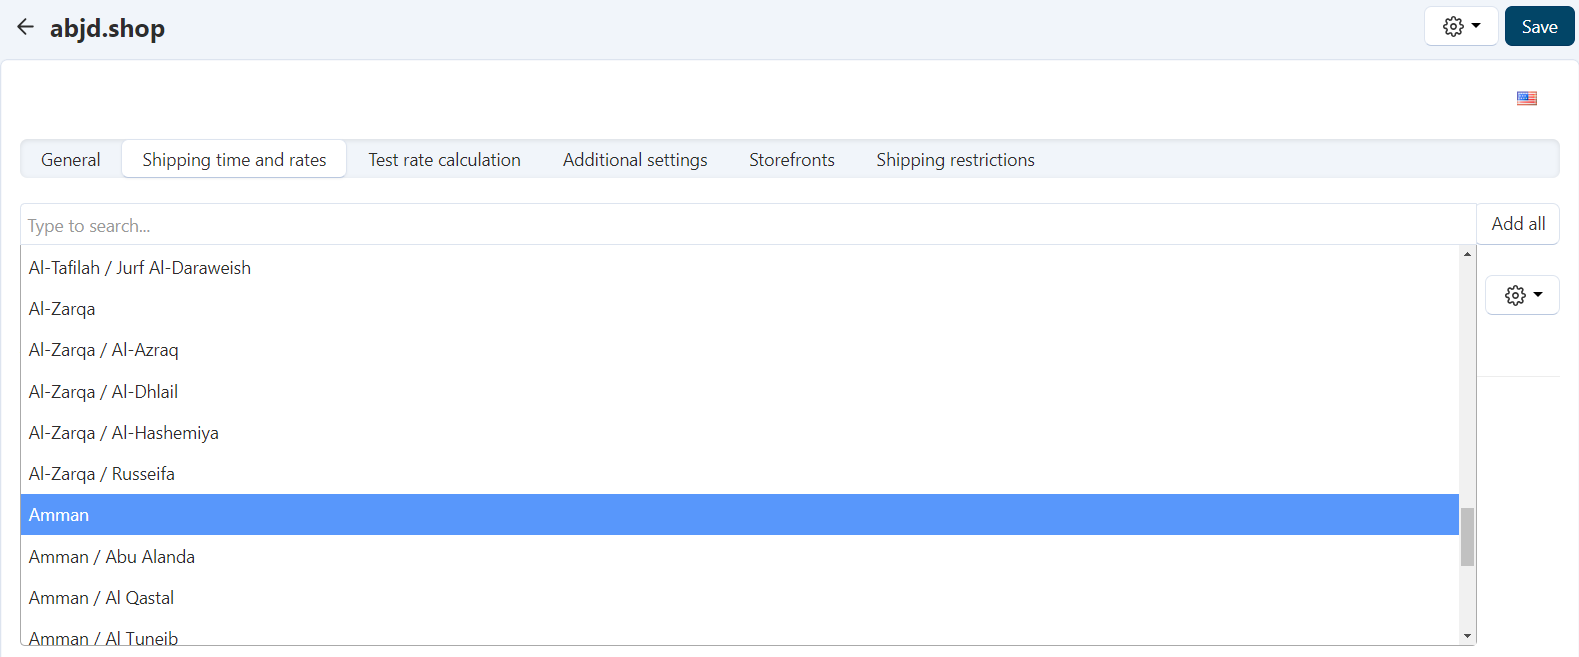
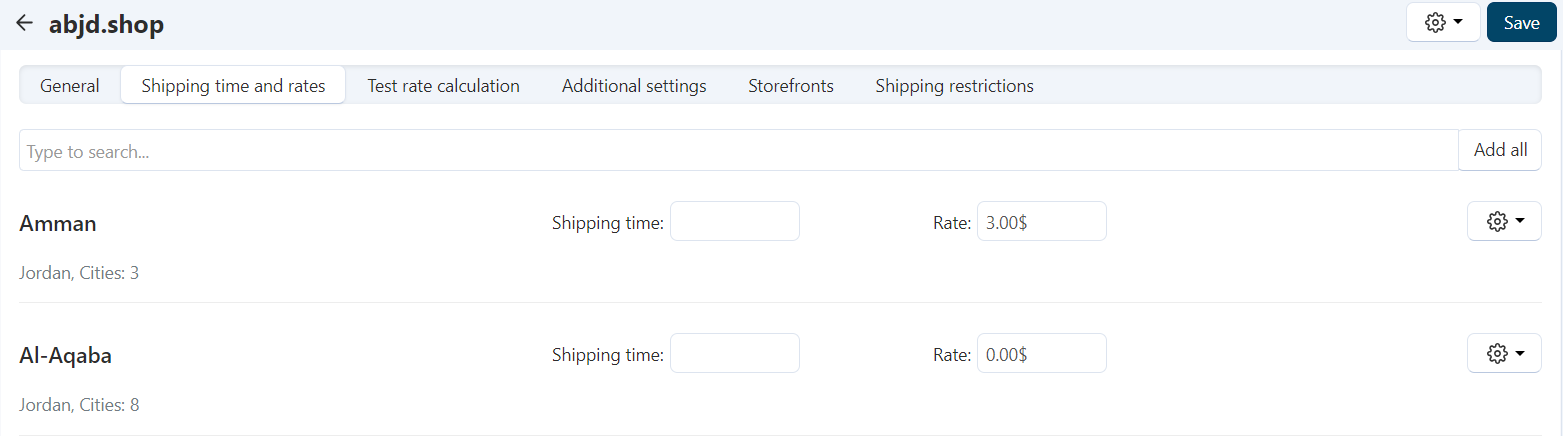
Your shipping method is now ready.
NextAdding Products
Adding A New Product
1. To add a product, go to the side panel on the left of the page click on "Products," and then select " Products".

2. Go to the top right and click the + button and click Create new product.
3. Fill the necessary fields:
- The name of the product.
- Select the suitable category for your product (Check Appendix B).
- Enter the selling price (Zero prices won’t be accepted).
- Upload one or many clean and suitable images showing the product (products with no picture or unsuitable or not matching won’t be approved) (Check Appendix A).
- Fill the stock field with the amount of how many items you have available and ready for selling (out of stock items won’t be displayed in the store).
- If your product is sold in large quantities, fill the necessary fields with the suitable data.
- If your product is digital (images, videos, books….), check the Downloadable box (if you check the box, the stock rules won’t be applied to your product).
- If you don’t want to restrain the buyer to 48 hours period of availability to download the product, check the Time-unlimited download box.
- When adding words to the “Search words” filed, the product will appear in the results of the search for those words, even if the product name or description doesn't have them, separate different search words by commas.
4. Click Create at the top right, and then, several tabs will appear.
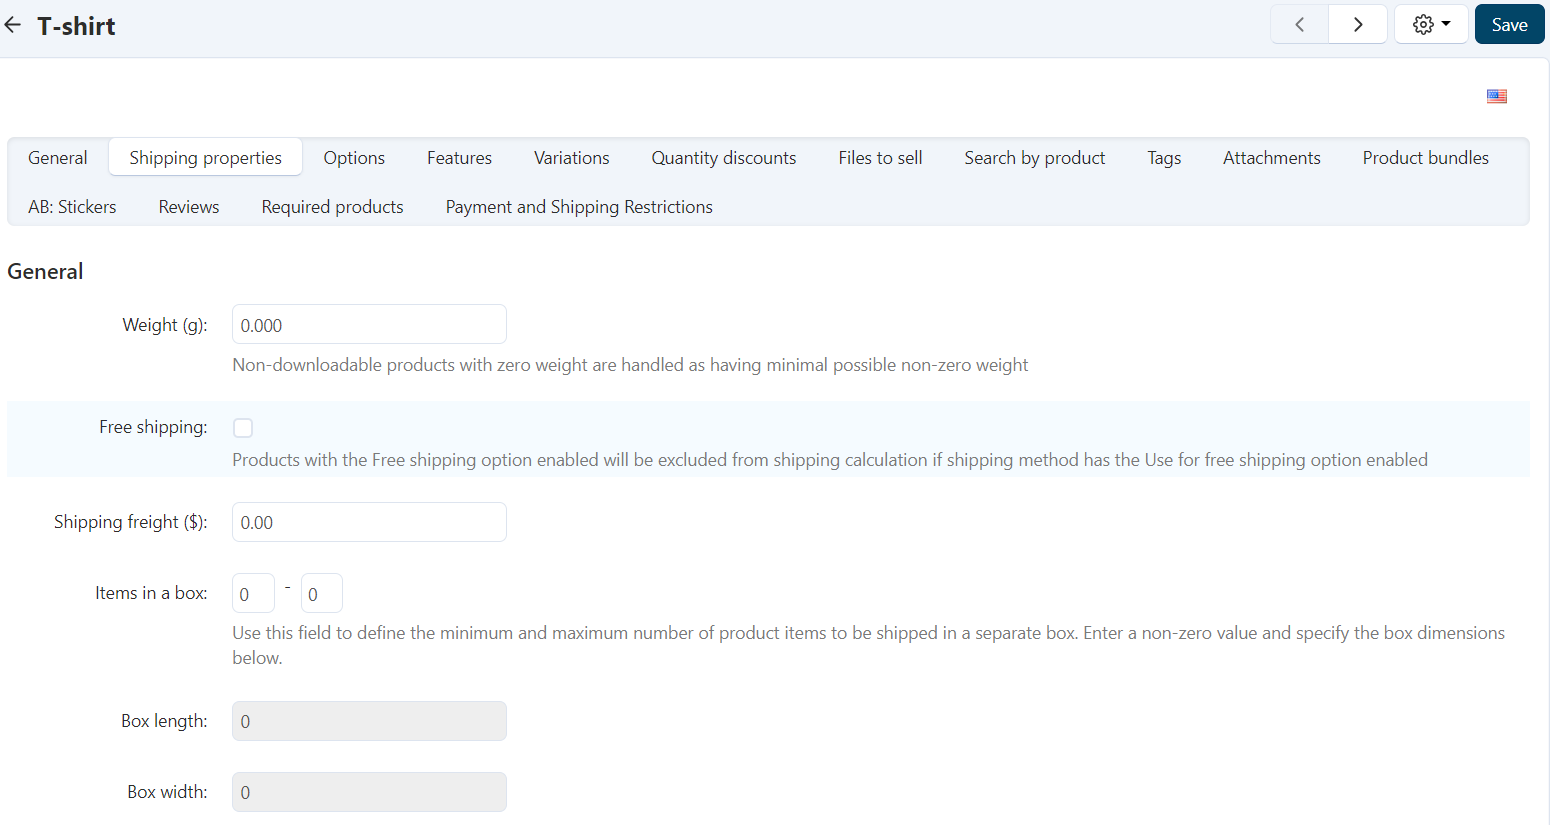
5. In the Shipping Proprieties tab, specify the shipping proprieties for the product (if necessary).
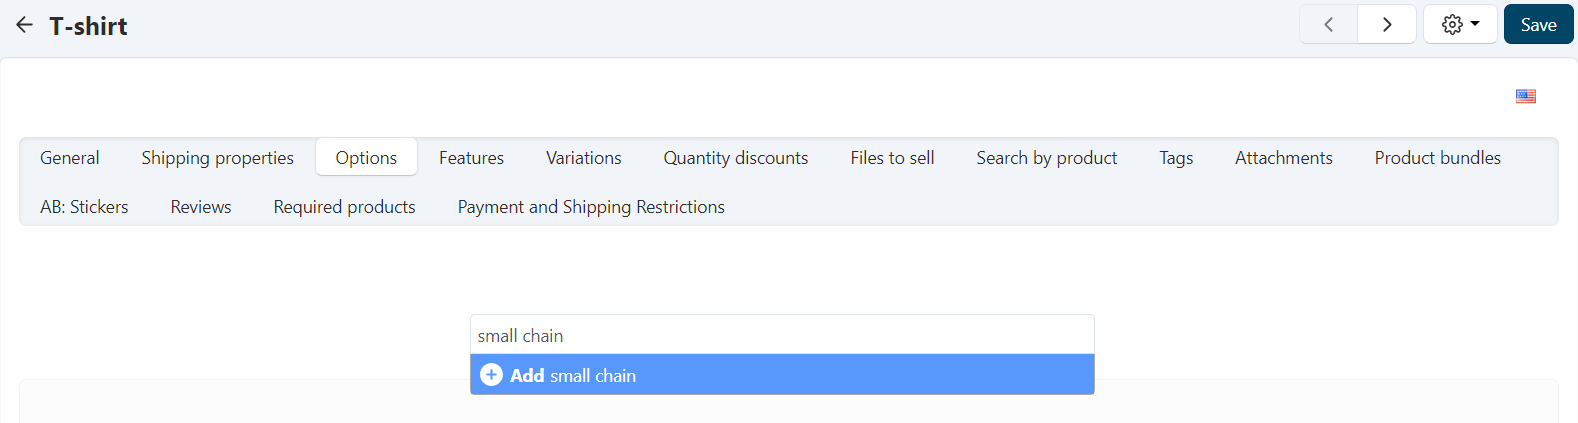
6. In the Options tab you can add any optional additional services or extra attachments and accessories.
- Create or use existing options by typing its name in the field.
- To create a new option, type the name and click Add.
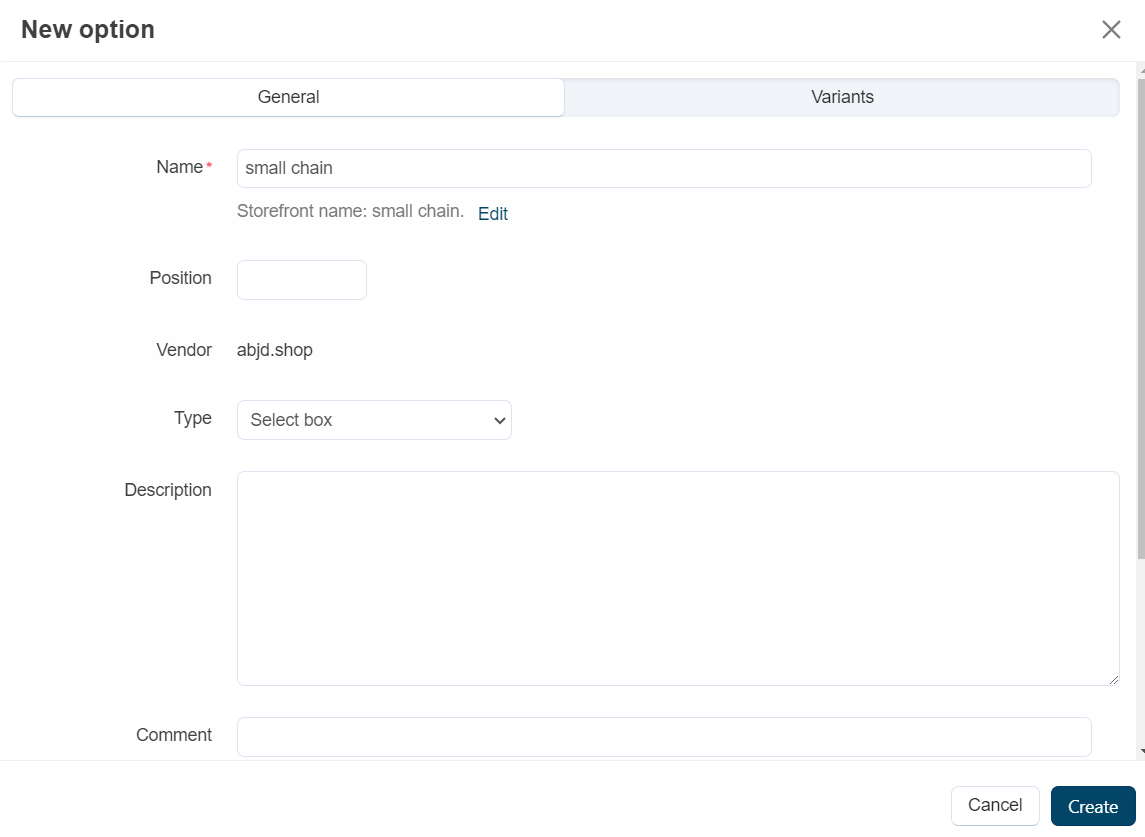
- Add option variants names in the field for a quick and free options and click Create or click on Advanced option creation to specify extra prices, display style and so on.
- In the Advanced option creation window, fill the fields, select the display style and check the required box only if it’s mandatory.
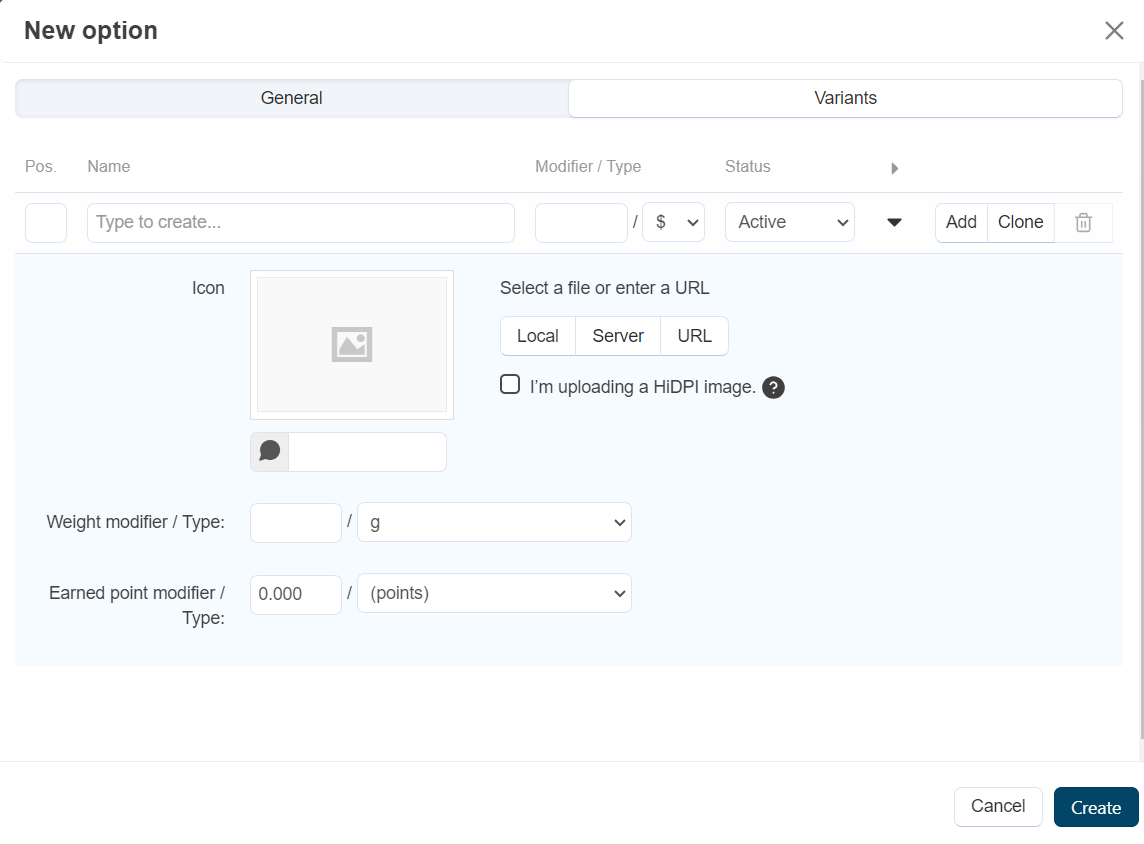
- Go to the Variants tab, add option variant and add the necessary information (Extra weight, price, variant image if needed) (Check Appendix A) and click Create.

7. In the Quantity discounts tab, you can specify a discount if a certain quantity of the product was bought in a single order.
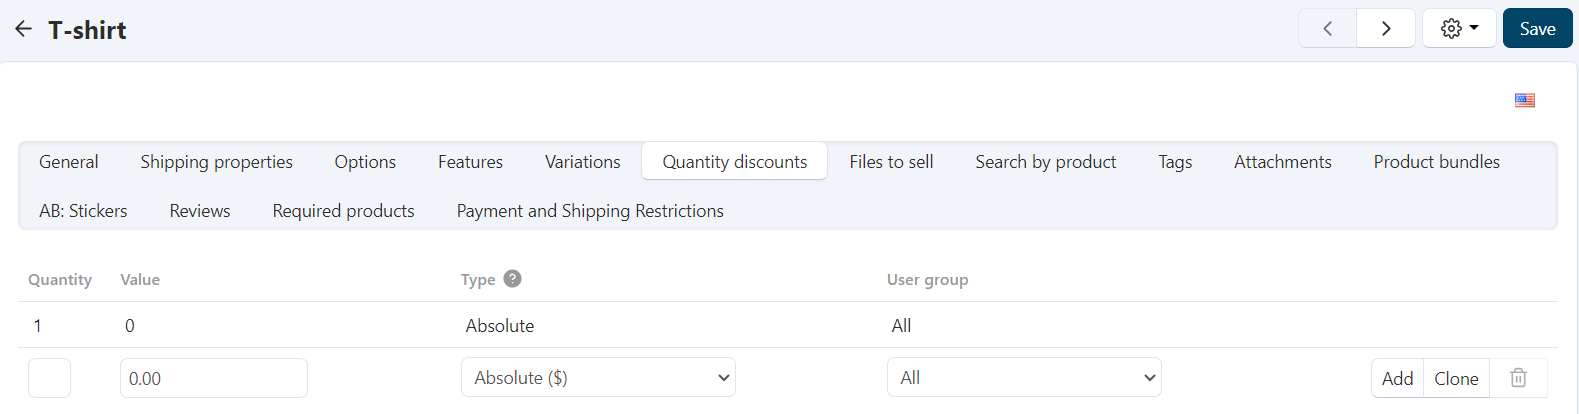
8. Add the quantity of the products, specify the price for a single item, select the type of the discount and click Add. You can add any different discounts depending on the quantity.
9. In the Files to sell tab you can upload the files you want to sell if the product was digital. Note: if you uploaded any files here your product will automatically turn into downloadable product (as specified in step 3).

10. Click on the add file to add your files. Fill the necessary fields. Upload your file and you can also upload a preview of the product. Make sure that you set the Activation mode to After full payment So that the buyer can download the file without any permissions from the admin.

Make sure you leave the max downloads field empty

Enter any the agreement for the buyer if you have any and click Create.
11. You can add any tags in the Tags tab.
12. You can Attach any files to your products like guides and manuals that will be available for all users.
13. You can add your product to existing bundles or adding a new bundle by clicking the Add new bundle button.

You need to name the bundle, add an image (Check Appendix A), description and specify an availability period.
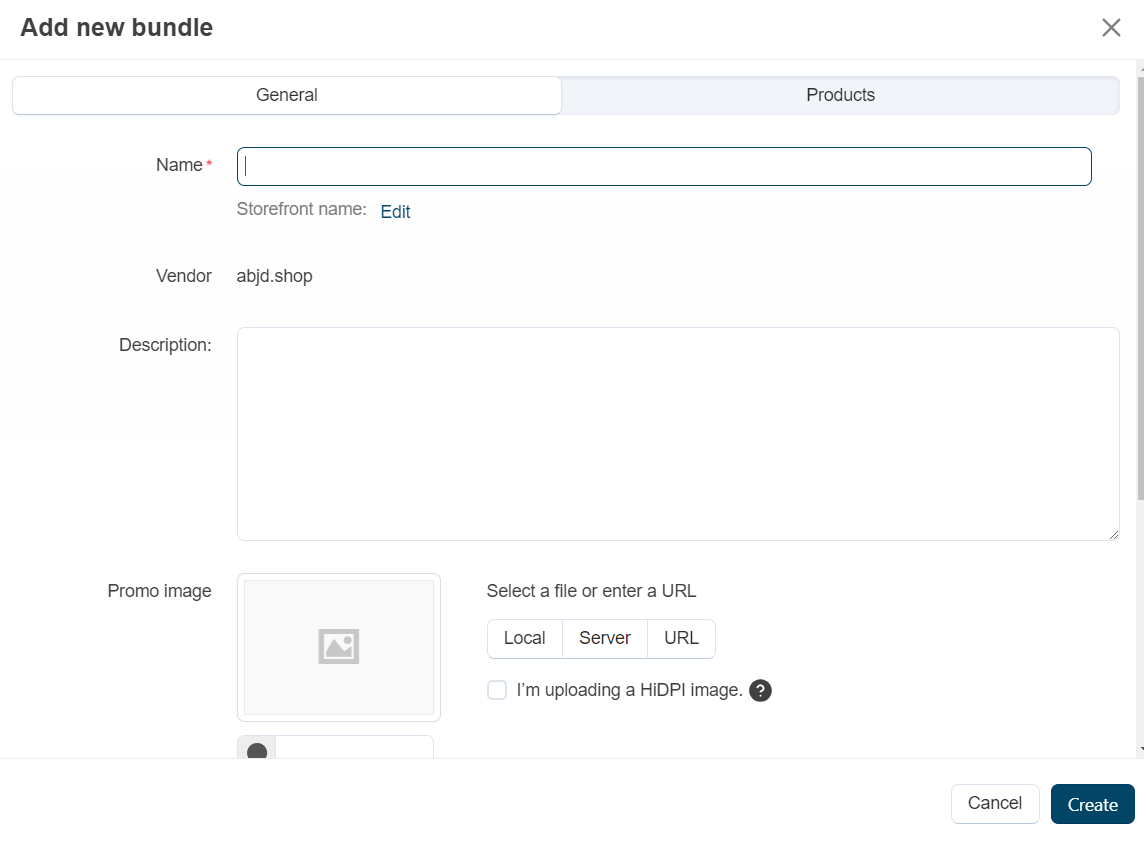
Go to the Products tab to add products to the bundle.
You can also put a discount on bundles for each product or for the whole bundle.

To create a discount on the bundle, add the discount value in the Share discount field and click Apply.
Click Create and your bundle is ready.
14. You can see the reviews on your product at the Reviews tab.
15. You can set a required products to your product if necessary (buyer can’t buy the product alone and the required products will be added to the cart automatically).
NextAdding Product Variants
Variants are specified based on the features of the product (e.g., color, size, memory capacity).
1. Select Products → Features on the side panel.
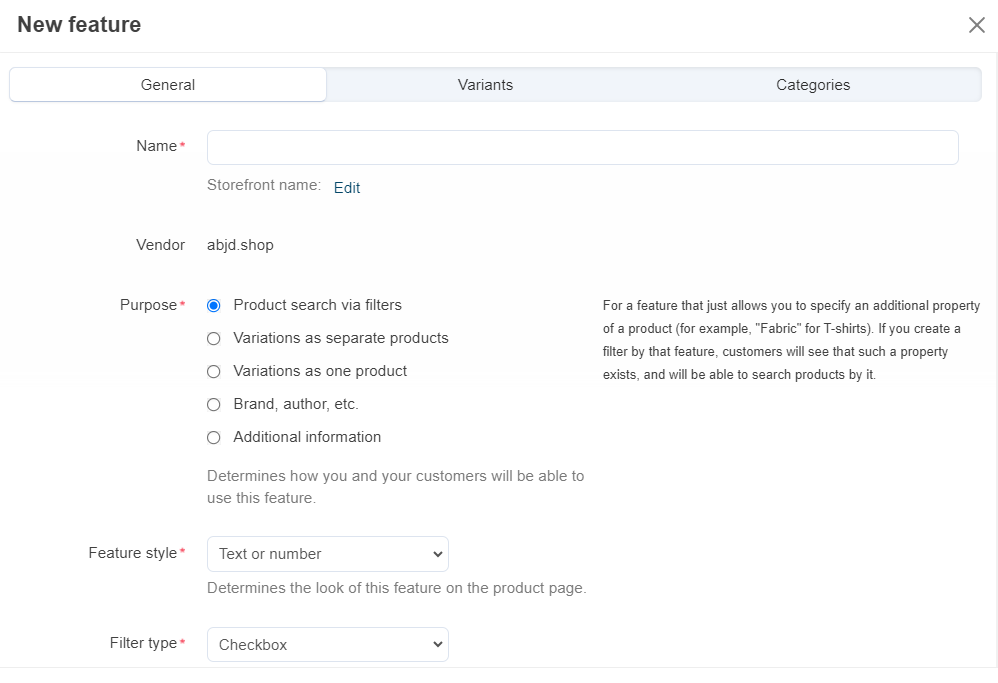
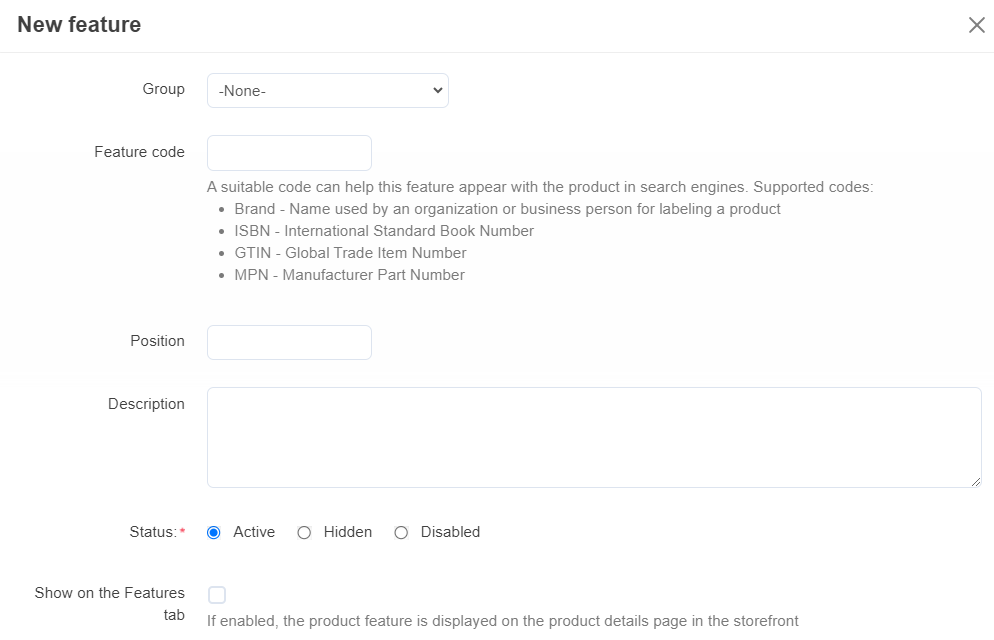
2. Click on the "New feature" button at the top right of the page.

3. In the General tab, name the feature (e.g., color for T-shirt, size for T-shirt), select the purpose,
feature style and filter style, and fill the necessary information.

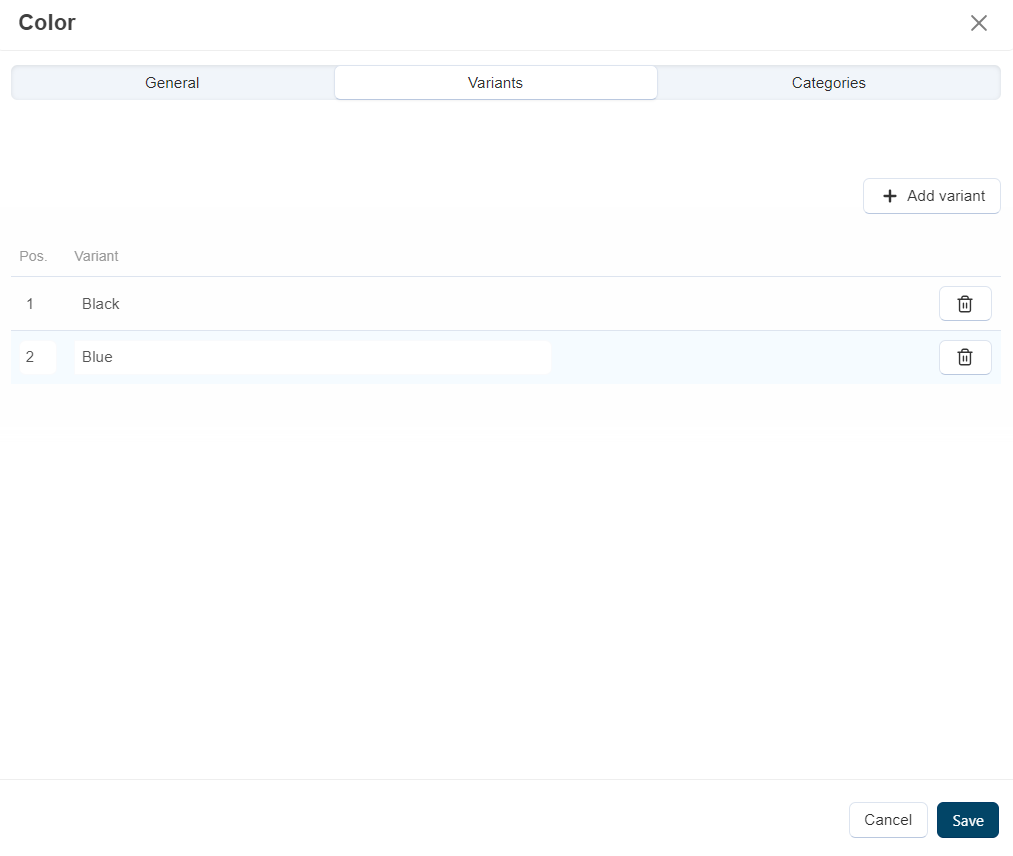
4. In the Variants tab name your variations (for size: s, m, l, xl, or color: black, red, blue) and click Create.
5. Go back to the Product and go to the Variations tab, click on Add variations.
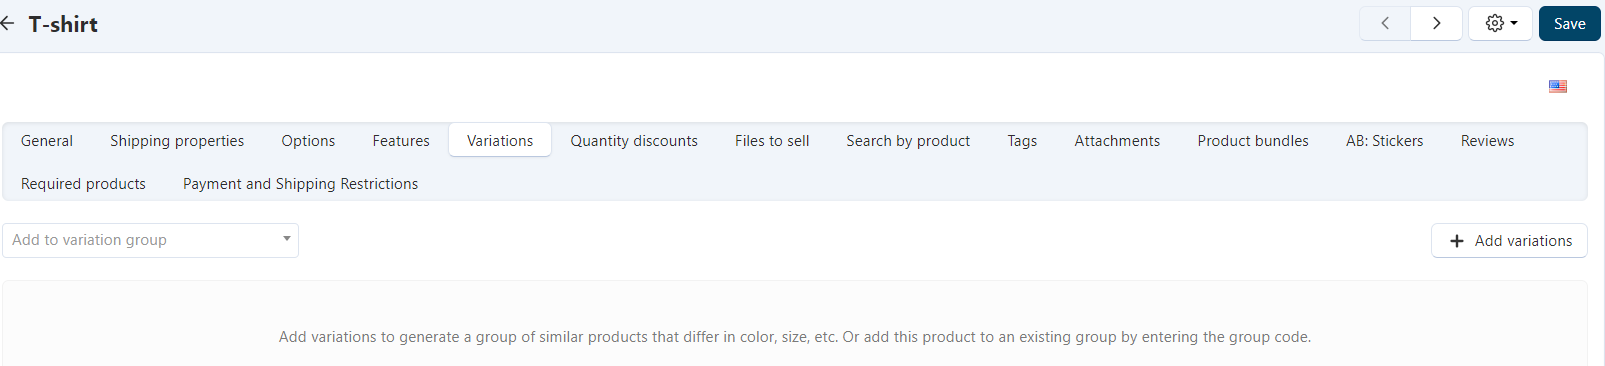
6. Select features to create variants from, specify the price for each one and the quantity.
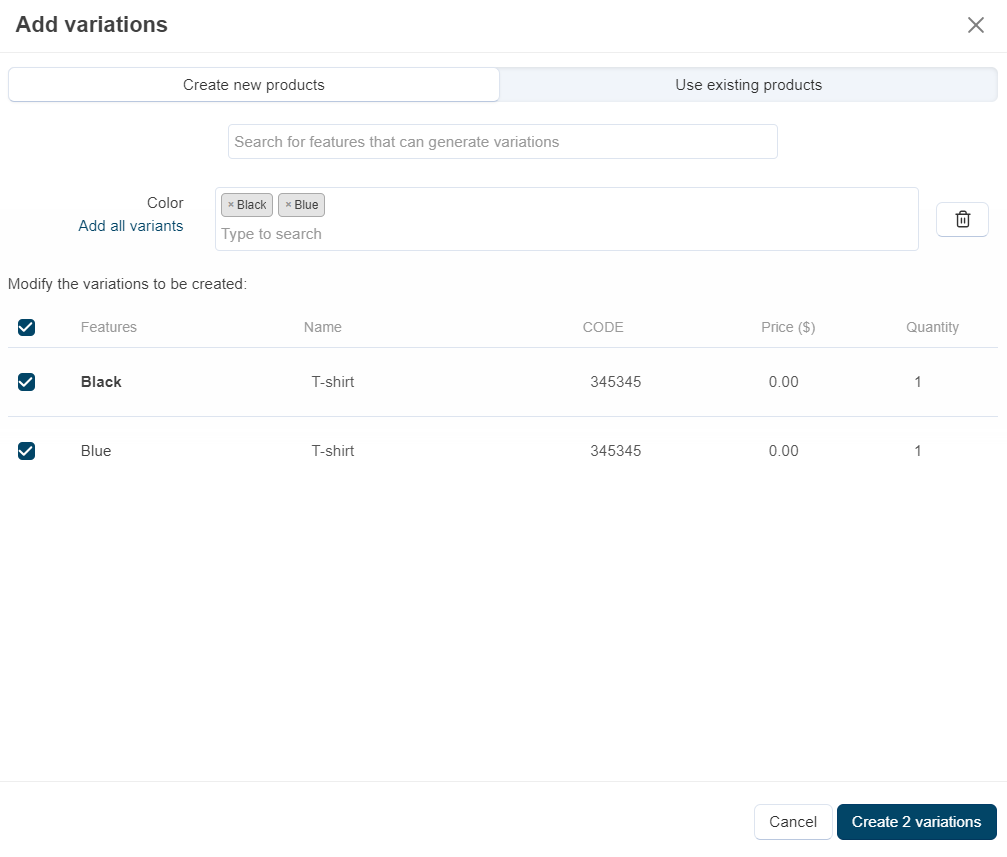
Click Create.
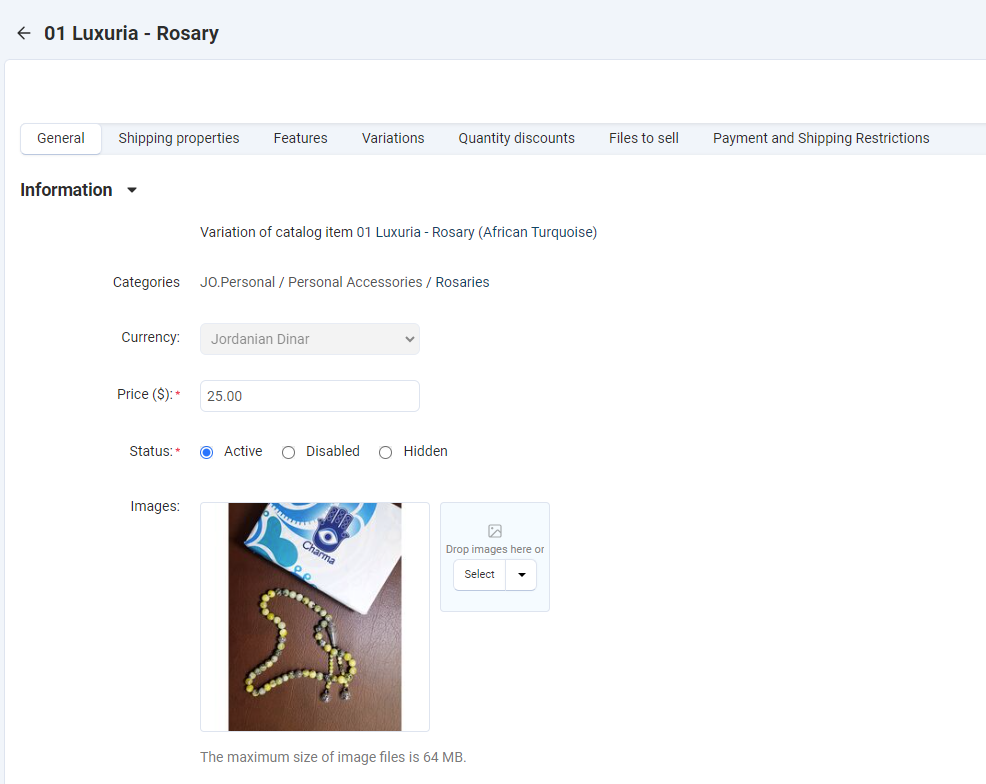
7. Each product variation will be shown in the products section as a separate product, you can upload different images for each variation, but all will be variations under one product.
To view the original product, click on the link Variant of catalog item… and you will be directed there.
Note: All product, feature and variant insertions are subject to moderation by the Marketplace and require approval before publishing.
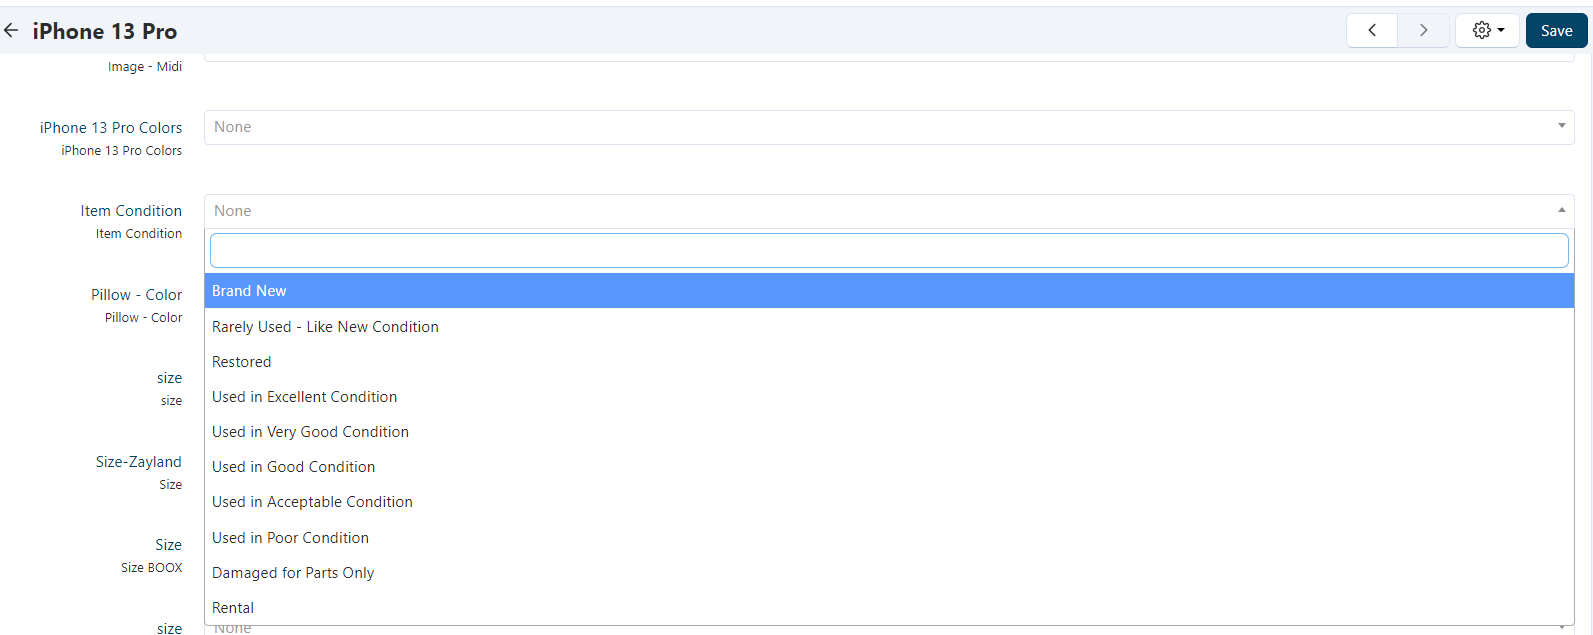
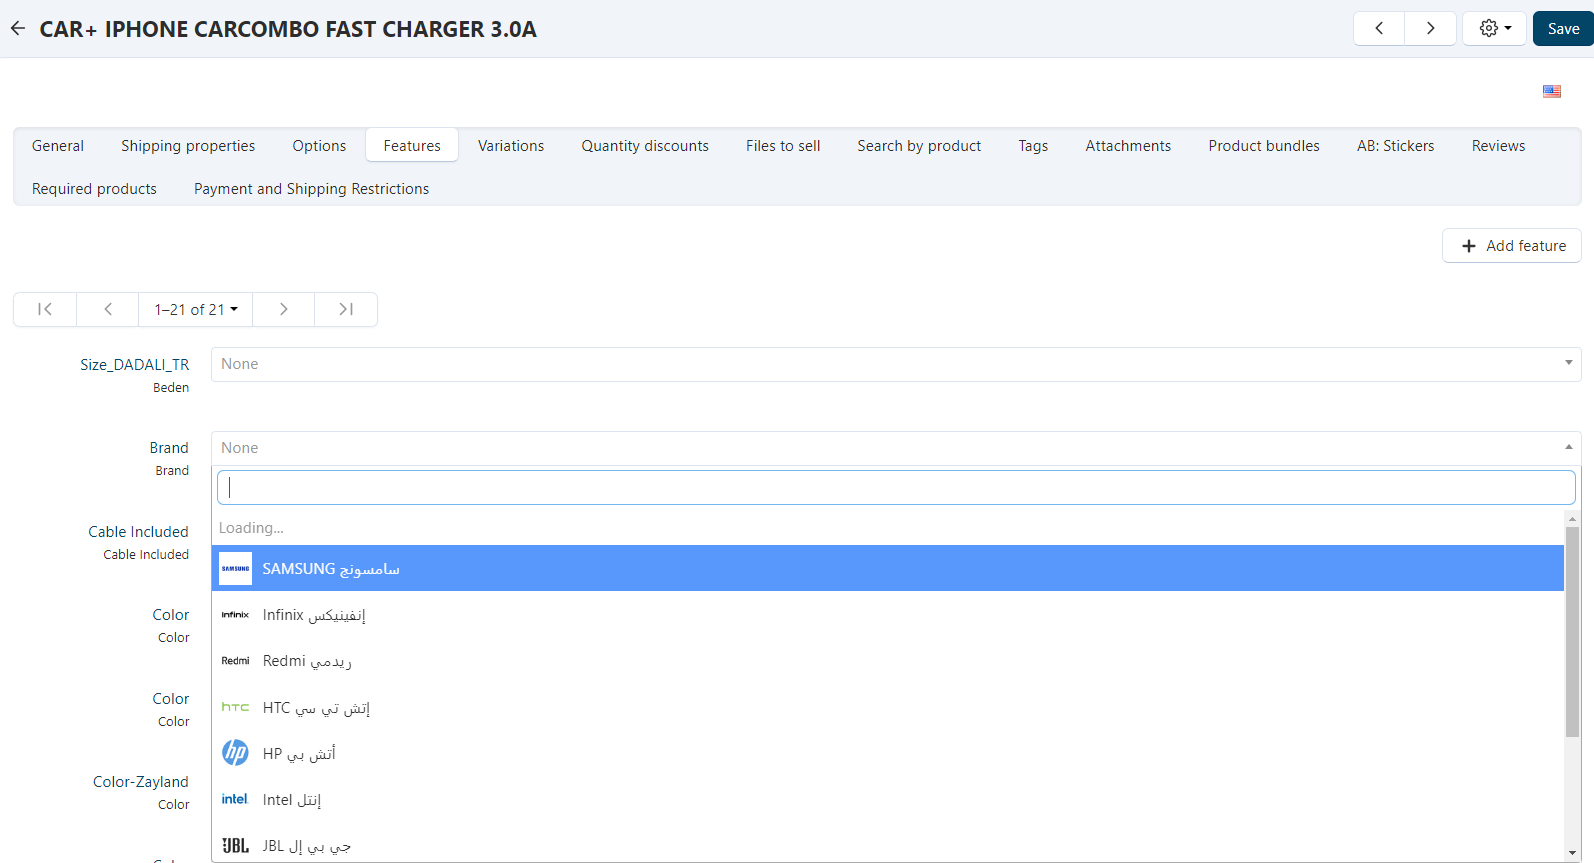
8. In case you are uploading a used item, you can select the global feature Item Condition to define the condition of your product.
Note: Please make sure to sellect the product brand from the Features panel.
Fulfilling Orders
1. When and order is placed by a customer, you will receive an email from store@abjd.store containing the order details, Customer address and final price.
2. Now you need to pack and ship your order, we recommend you contact the Customer to confirm the address prior to shipping.
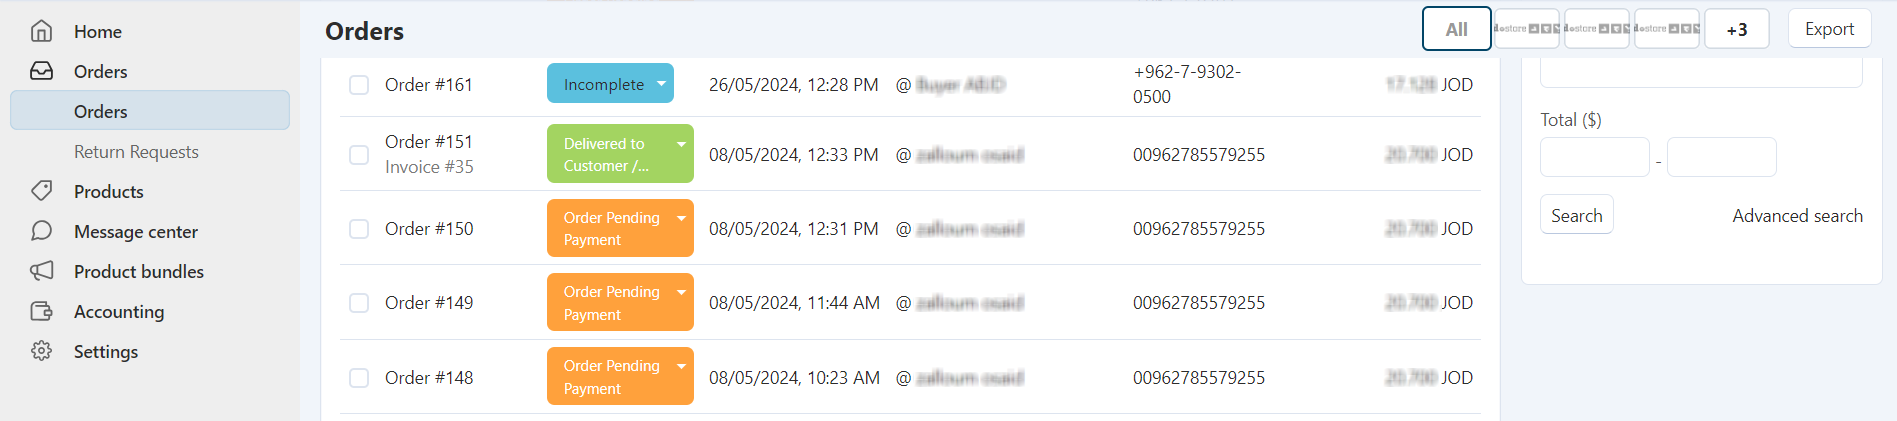
3. In the Orders page you can manage and view the order and change its status as per the actual progress.
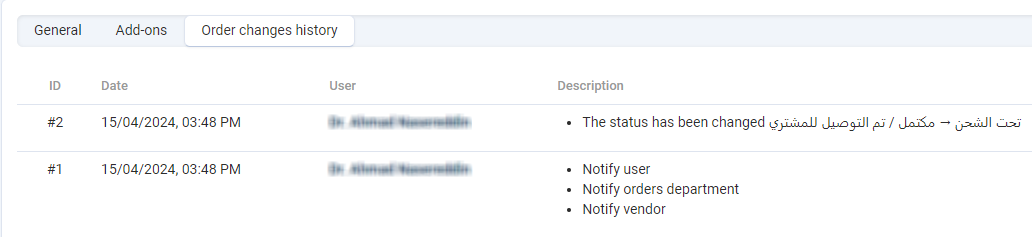
You can view the history of your order status changes on the “Order Changes History” tab.
4. You can open the order and view the details by clicking the Order Id.

If you are using a carrier service, you can enter the tracking number in the tracking number field at the bottom right.
5. Change the status of the order as the fulfillment progress by clicking on each status from the list, the Marketplace and the buyer will be notified of this change.
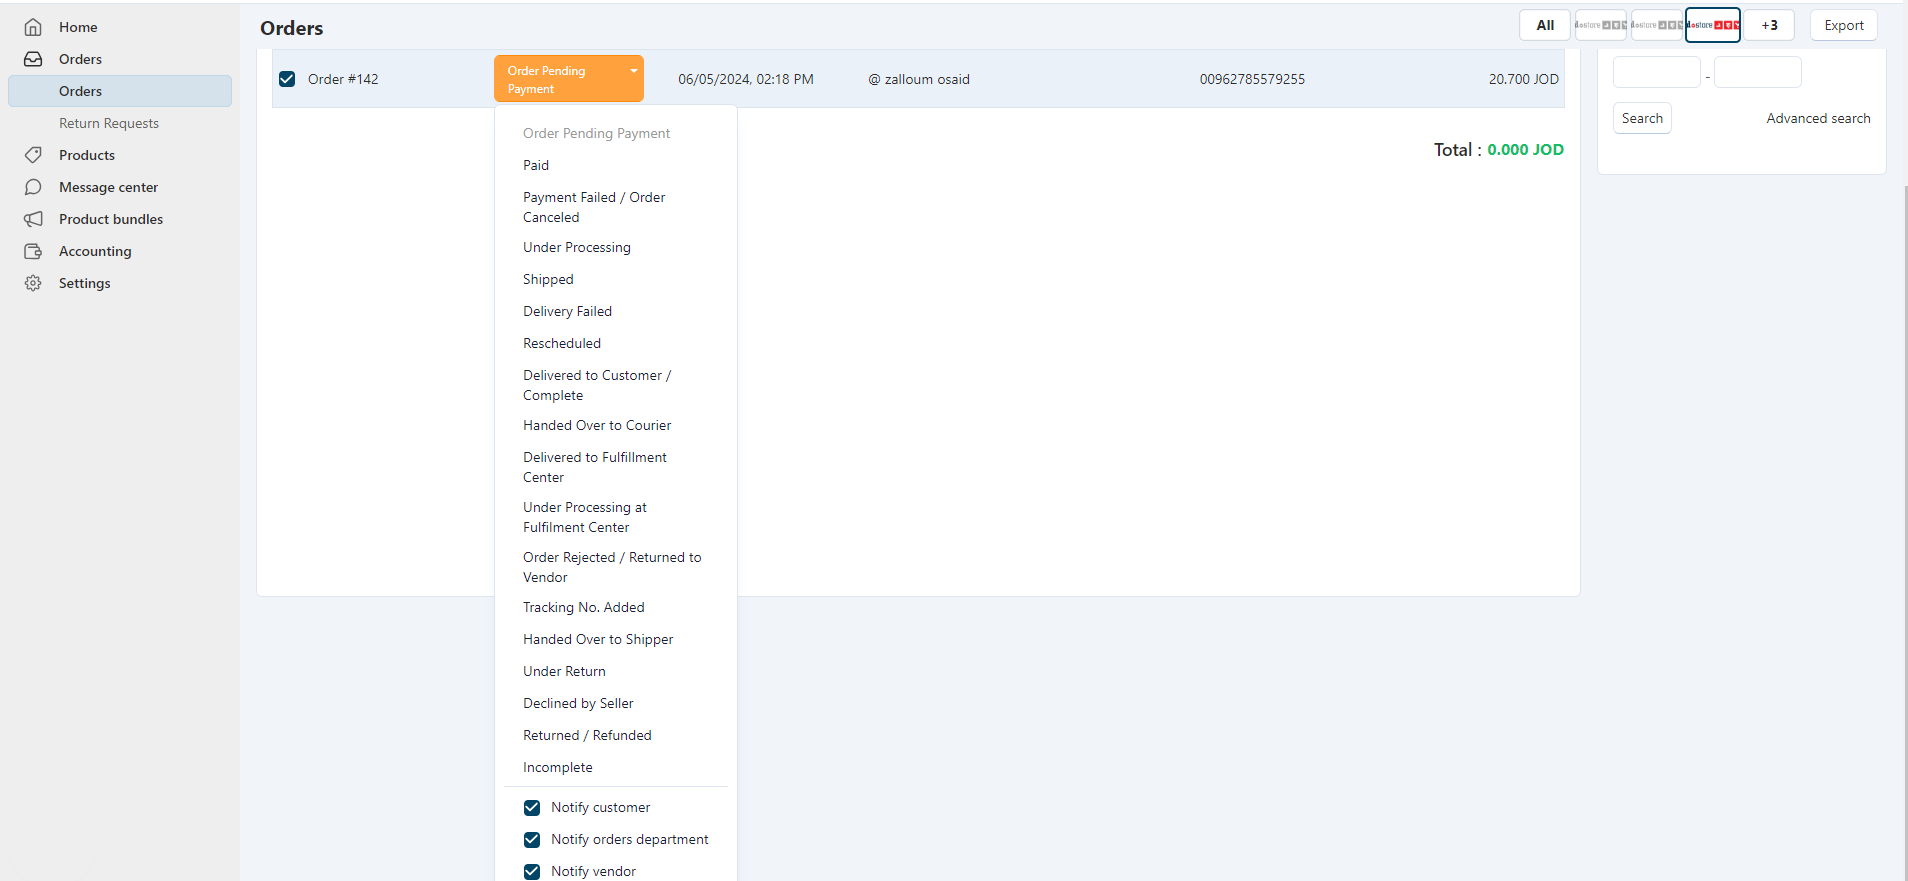
Note: the order value won’t be added to the Vendor / Seller account balance unless the order status reaches to Complete.
The Seller is responsible for updating the fulfillment progress and it will require confirmation by the Customer once Complete.
6. The available Order Statuses are as follows:
If the Seller wants to cancel or decline on the order for reasons like stock depletion or any other reason, then proceed directly to Declined by Seller status. The Customer will be refunded by the Marketplace and the Vendor / Seller will be charged the Marketplace costs.
NextReturns and Refunds
It is possible that Customers will ask for a Return or a Refund for a specific order within 48 hours from order completion.
When the Customer makes a Return / Refund request, you will receive an email containing the information of what items the Customer wants to Return or Refund, the quantity of each item and the reason why they want to return each item, you can view the return request by going to Orders-> Return Requests on the side bar, click the ID number of the desired return request, now you can choose the action you want to make for each requested item.

-
If the item was requested for “Replace” it will have the initial status “Under Processing”, after that you can choose one of the following:
- Replaced / Repaired Successfully: in case the replacement or repair is done successfully.
- Replacement / Repair Unavailable: in case the replacement or repair is not available, in this case the admin will change the return request from “Replace” to “Refund”.

-
If the item was requested for “Return / Refund” it will have the initial status “Under Processing”, after that you can choose one of the following:

- Request Unjustified: in case the Customer’s request is unjustified.
- Replacement / Repair Unavailable: in case the replacement or repair is not available.
- Item Withdrawn: you must select this action when the item is withdrawn from the Customer successfully.
- The admin will process the Refund to the Customer.
- Replacement / Repair Available: in case the item can be repaired or replaced, with confirmation from the Customer, the admin will change the request to “Replace”.
- Replaced / Repaired Successfully: in case the replacement or repair is done successfully.
- If Replacement or Repair fail, select Replacement / Repair Unavailable.

Sales Tax
The Marketplace does not offer Sales Tax calculation as not all Vendors / Sellers / products are subject to Sales Tax, hence, Vendors / Sellers that are subject to Sales Tax must upload their product price as Sales Tax inclusive.
Sales Tax is the responsibility of the Seller, he shall be responsible for issuing his own invoices detailing the Sales Tax in addition to its payment to the respective authorities. Order summaries issued by the Marketplace are in the name of the Seller and include the Seller’s Sales Tax registration number and Sales Tax details as provided by him under his own responsibility. The Marketplace acts as a facilitation and marketing platform not as a Seller
NextInvoicing
The Vendor / Seller must issue an official invoice for each order made on the Marketplace; the invoice must have the same value as the order summary. If the Vendor / Seller is subject to Sales Tax, the invoice should provide details of the Sales Tax as per the governing laws.
The Vendor / Seller must provide a copy of the invoice to the Customer and Marketplace, orders not covered by official invoices will not be paid to the Vendors / Sellers.
In return, and after the successful completion of order fulfillment, the marketplace shall issue a sales tax invoice to the seller for the amounts charged by the marketplace, where the seller can clear it in his sales tax account.
NextAccounting
In the Accounting page Transactions tab, you can view your total income, income from each order and the extra charges from the Marketplace.
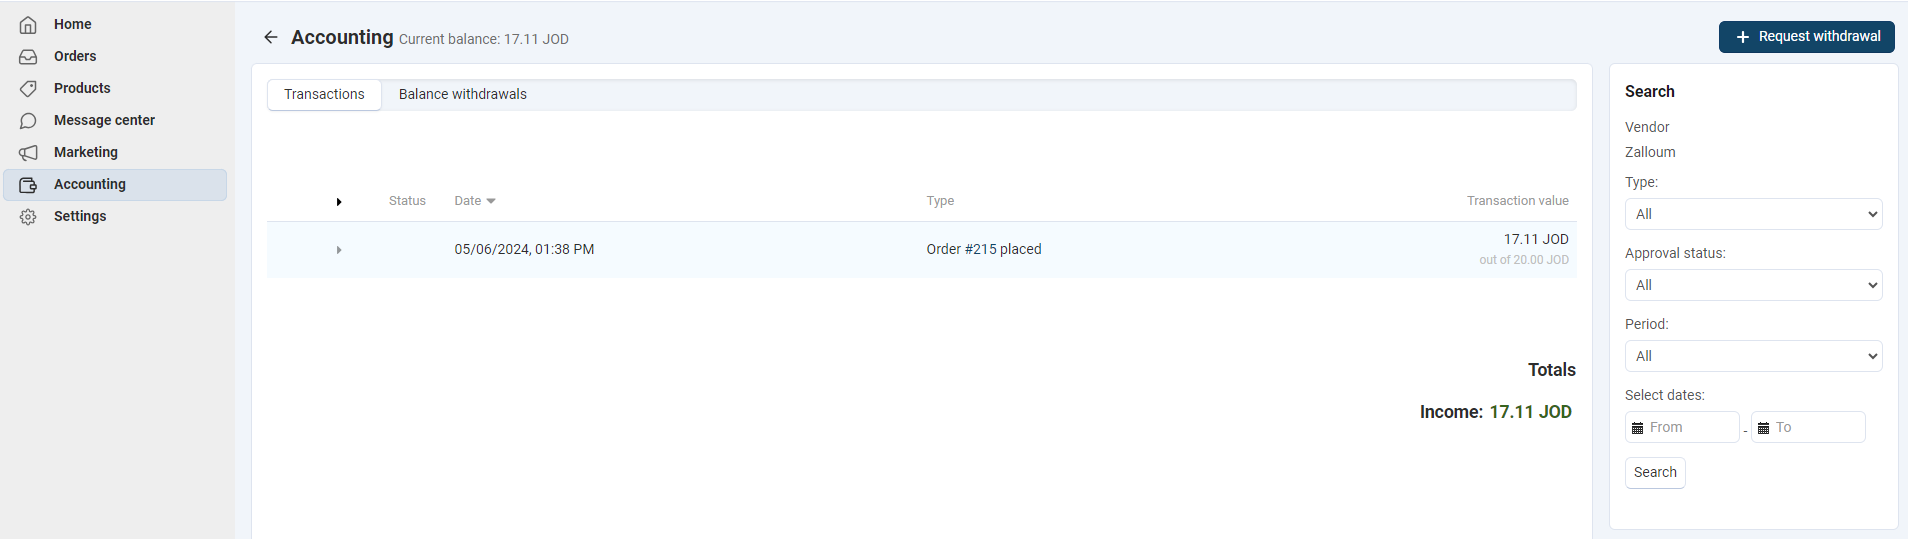
Balance Withdrawals
The Marketplace does not pay Vendors / Sellers unless they request payment, this is done via balance withdrawals.
Payment to Vendors / Sellers are made every Thursday and include balance withdrawals made on the week before as per the following payment cycle.
In the Balance Withdrawals tab, you can view all your balance withdrawals from the Marketplace.

You can request a balance withdrawal by clicking the "Request withdrawal" button on the top right.
Enter the desired value and add any comments if needed.

Balance withdrawals should be under or equal to the Vendor / Seller available balance sum.
NextPromotions
The Marketplace offers Vendors / Sellers an easy way to make promotions as follows:
All promotions are free and made based on written requests from Vendors / Sellers and administered by Marketplace Administrators.
Advertisements
The Marketplace offers Vendors / Sellers an easy way to advertise their products, campaigns, offers and special promotions.
The available ways are as follows:
- Featured Items Scroller Display product in Featured Items Scroller on Main Page Duration: 3 Days Price: 30 JD
- Marketplace Banners
- Email Shots
To all Marketplace members (Customers & Vendors / Sellers) (Image Size 800x1000px): Price 50.00 JD
All prices are subject to the applicable Sales Tax.
NextAppendix A – Images Standards
As a Vendor / Seller you have several images to upload to your store, below are the recommended sizes and proportions for each one of them:
Logo Image for customer area: Size 60x240 px, Proportion 1:4
Logo image for emails: Size 420x420 px, Proportion 1:1
Shipping Method Image: Size 60x240 px, Proportion 1:4
Product Image: Size 420x420 px, Proportion 1:1
Option Image: Size 420x420 px, Proportion 1:1
Product Bundles Image: Size 420x420 px, Proportion 1:1
You may increase the size of some images to enhance the resolution, however, you should maintain the proportions.
Try to upload clean image to enhance your sales chances as image affect greatly the Customer’s experience, if you face trouble cleaning your images, try using some 3rd party services like www.remove.bg
NextAppendix B – Product Categories
Appendix C – Add Products in Bulk
You can add products in bulk via a csv file.
You must make any changes to features and variants before uploading, as they will be consolidated under one product and one variation group code. You will be able to add large quantities of products.
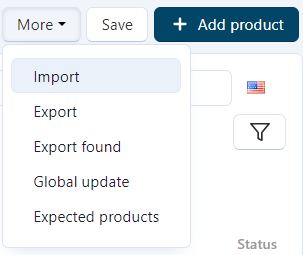
1. Click on the More button at the top right and choose “Import”
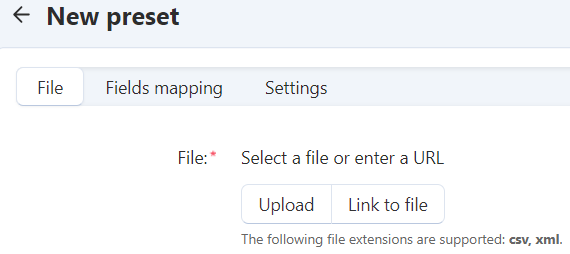
2. At the top right, click the +Add preset at the top right.

3. Select “Upload” to upload a csv file from your local machine.
4. the file format should be as shown in the following image.

- Where the first column contains the product name.
- Second column contains the product price.
- Third column contains the product code.
- Fourth column contains the product’s quantity (available stock).
- Fifth column contains the Category link, you can find all the categories link in the provided file “Categories links”, you can find the suitable category for your product, copy the link and paste it in the “Category” column.
- Sixth column contains the Product display image link (URL), or several links that are separated with three forward slashes “///”, if there is no available URL for your product’s image you can leave the cell empty and upload the images from your local machine for each product separately from the products page.
5. after selecting your file, click “Create” on the top right.

6. now go to the “Fields mapping” tab.

7. for the “PRODUCT PROPERTY IN MULTI-VENDOR” column, for each column name, select the property with the same column name as shown in the image below.

8. click “Import” at the top right.

You will receive a success message telling you how many products were successfully imported as shown below

If you received an error message, please try again and follow the instructions carefully and make sure the file extension is “csv”.
9. Your imported products will now be available at the products page and you can edit each product separately.
